Scroll Bars |
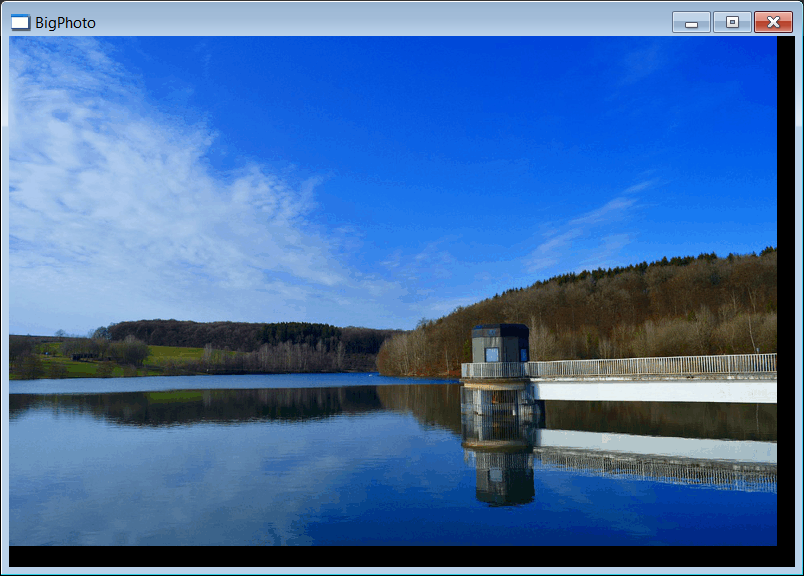
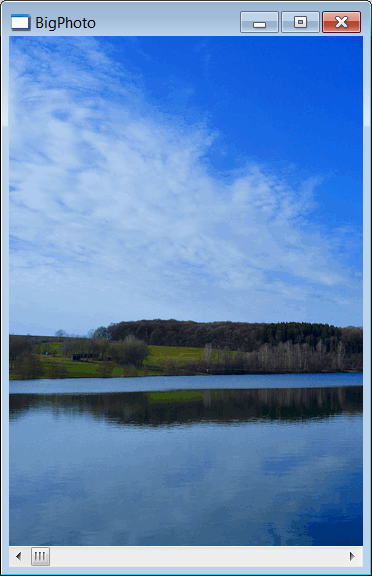
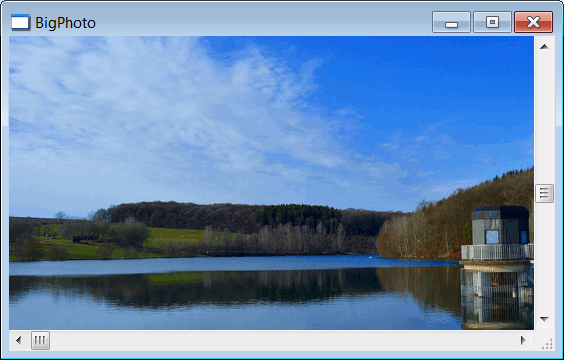
| Any windows can have a vertical scrollbar and/or a horizontal scrollbar. Scrollbars are used to display an object that does not fit inside the window. Cualquier ventana puede tener una barra de desplazamiento vertical y/o una barra de desplazamiento horizontal. Las barras de desplazamiento son usadas para mostrar un objeto que no cabe dentro de una ventana. |
| Problem 1 |
| Create a Window Application (using Wintempla) called BigPhoto to test scrollbars. For this problem, you will need a big uncompress bitmap (*.bmp). Cree una aplicación de Ventana (usando Wintempla) llamada BigPhoto para probar las barras de desplazamiento. Para este problema, usted necesitará un bitmap sin comprimir grande (*.bmp.) |
| Step A |
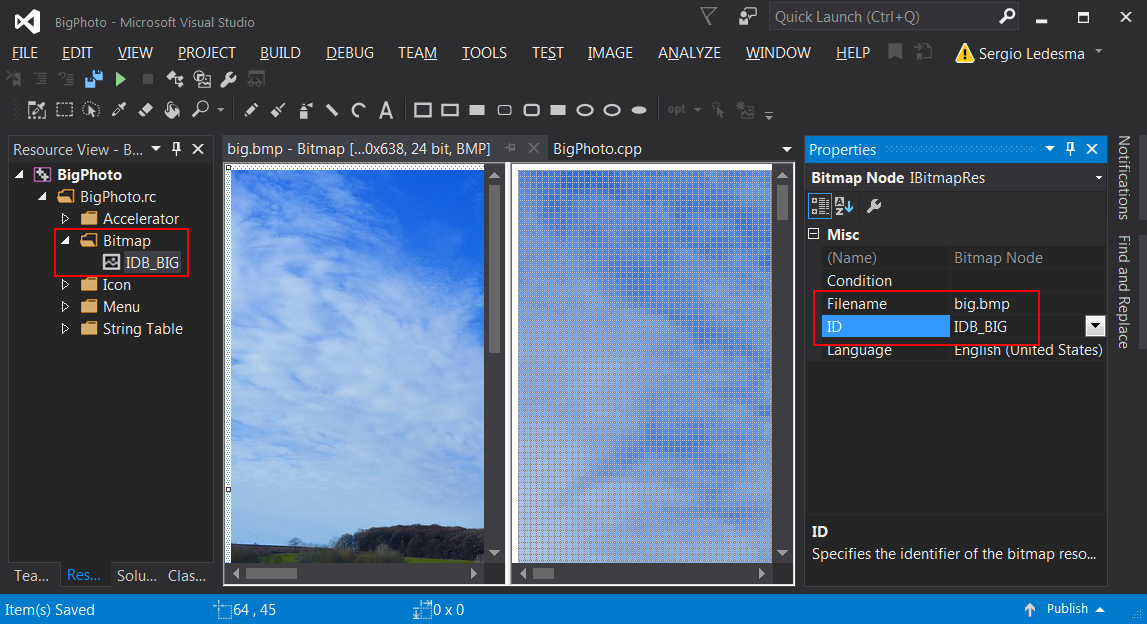
| Copy the bitmap file, big.bmp, in the project folder. Then, use Resource View to add the bitmap to your project using the context menu as show. Finally, change the bitmap ID to IDB_BIG. Copie el archivo bitmap, big.bmp, en la carpeta del proyecto. Entonces, use la Vista de Recursos para agregar el mapa de bits a su proyecto usando el menú de contexto como se muestra. Finalmente, cambie el ID del mapa de bits a IDB_BIG. |
| Step B |
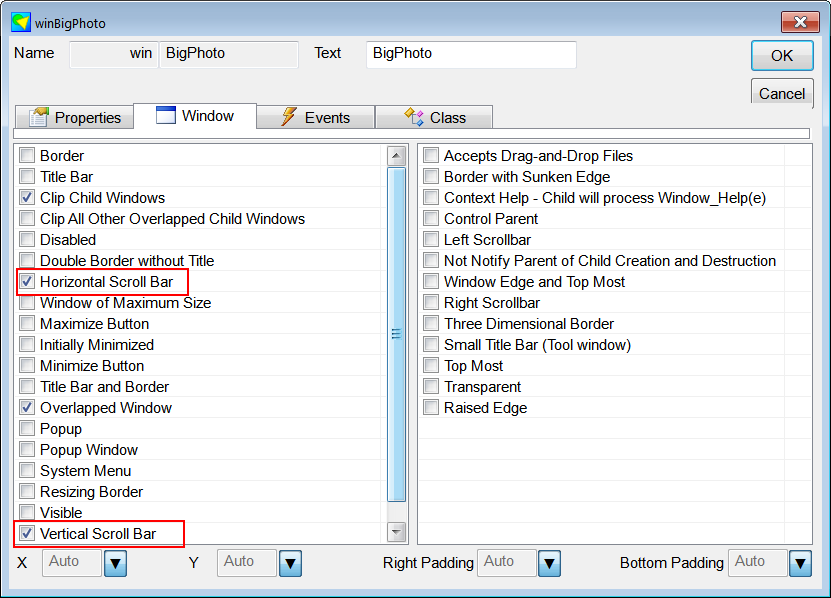
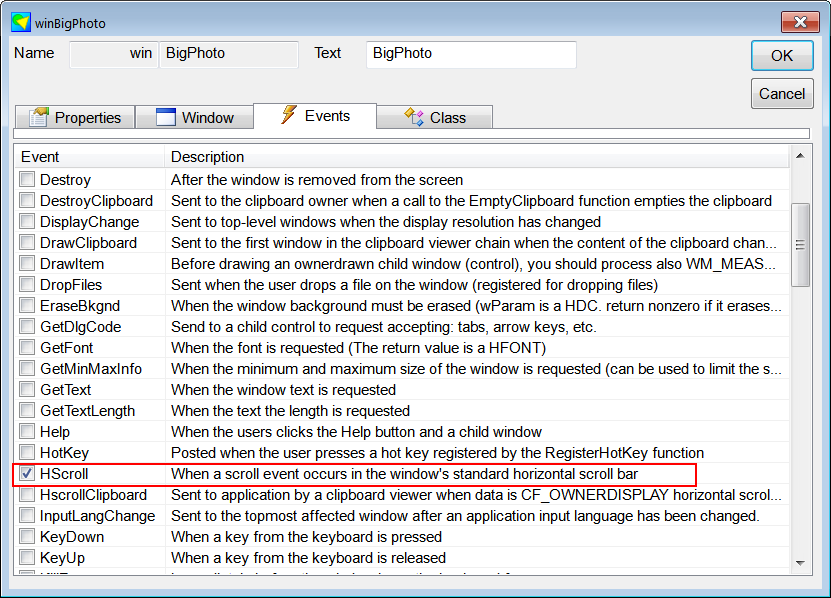
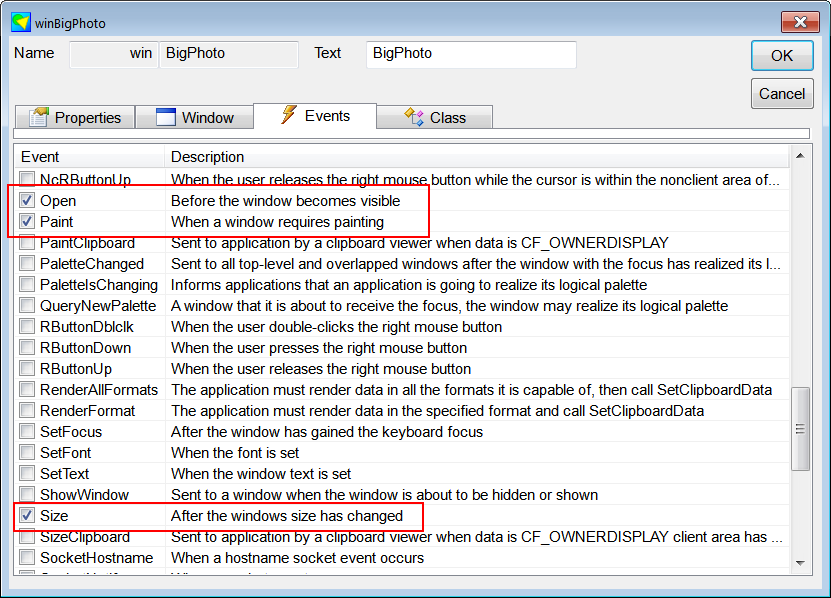
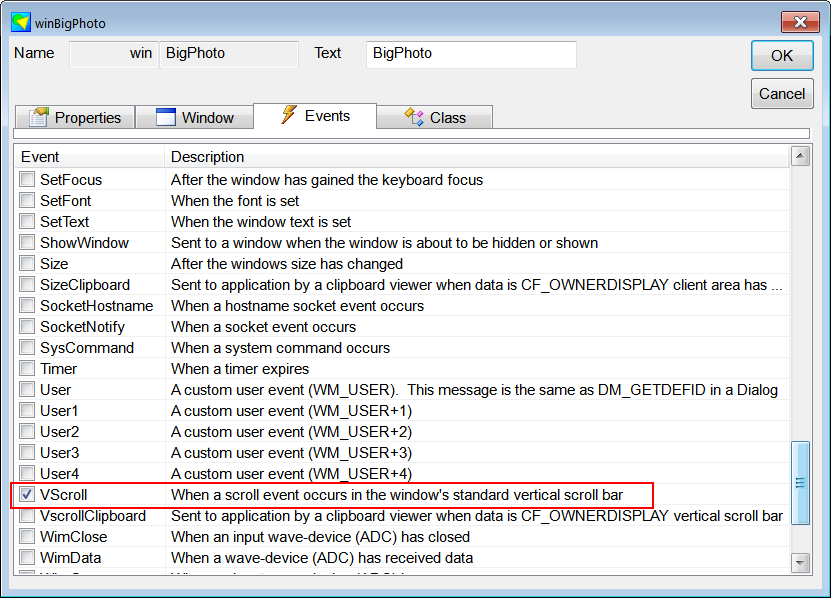
| Open Wintempla and double click to modify the properties and events of the main Window as shown. Abra Wintempla y haga clic doble para modificar las propiedades y los eventos de la ventana principal como se muestra. |
| Step C |
| Edit the BigPhoto.h file and the BigPhoto.cpp file as shown. Edite el archivo BigPhoto.y y el archivo BigPhoto.cpp como se muestra. |
| BigPhoto.h |
| #pragma once //______________________________________ BigPhoto.h #include "Resource.h" class BigPhoto: public Win::Window { public: BigPhoto() { } ~BigPhoto() { } CG::DDBitmap bitmap; . . . }; |
| BigPhoto.cpp |
| #include "stdafx.h" //________________________________________ BigPhoto.cpp #include "BigPhoto.h" int APIENTRY wWinMain(HINSTANCE hInstance, HINSTANCE , LPTSTR cmdLine, int cmdShow){ BigPhoto app; app.CreateMainWindow(L"BigPhoto", cmdShow, IDI_BigPhoto, NULL, (HBRUSH)(COLOR_WINDOW + 1), hInstance); return app.MessageLoop(IDC_BigPhoto); void BigPhoto::Window_Open(Win::Event& e) { bitmap.CreateFromResource(hInstance, IDB_BIG); } void BigPhoto::Window_HScroll(Win::Event& e) { SCROLLINFO si; if (GetScrollShiftH(e, si) != 0) this->Repaint(NULL, true); } void BigPhoto::Window_VScroll(Win::Event& e) { SCROLLINFO si; if (GetScrollShiftV(e, si) != 0) this->Repaint(NULL, true); } void BigPhoto::Window_Size(Win::Event& e) { //_____________________________________________________ 1. Setup the scroll bars this->SetScrollRangeH(0, MAXIMUM(0, bitmap.GetWidth() - width)); this->SetScrollRangeV(0, MAXIMUM(0, bitmap.GetHeight() - height)); } void BigPhoto::Window_Paint(Win::Event& e) { CG::Gdi gdi(hWnd, true, false); //_____________________________ 1. Compute x and y const int x = this->ScrollPositionH; const int y = this->ScrollPositionV; //_____________________________ 2.Paint on the screen gdi.DrawBitmap(bitmap, -x, -y); } |
| Problem 2 |
| To reduce flickering in the previous problem, add double buffering. Para reducir el parpadeo en el problema previo, agregue doble buffering. |
| Step A |
| Add another bitmap for double buffering as shown. Agregue otro mapa de bits para proporcionar double buffering como se muestra. |
| BigPhoto.h |
| #pragma once //______________________________________ BigPhoto.h #include "Resource.h" class BigPhoto: public Win::Window { public: BigPhoto() { } ~BigPhoto() { } CG::DDBitmap bitmap; //__________________________ Problem 2 CG::DDBitmap doubleBuffer; . . . }; |
| Step B |
| Use the NULL Brush to paint the background of the window as shown. Use la Brocha Nula para pintar el fondo de la ventana como se muestra. |
| BigPhoto.cpp |
| #include "stdafx.h" //________________________________________ BigPhoto.cpp #include "BigPhoto.h" int APIENTRY wWinMain(HINSTANCE hInstance, HINSTANCE , LPTSTR cmdLine, int cmdShow){ BigPhoto app; app.CreateMainWindow(L"BigPhoto", cmdShow, IDI_BigPhoto, NULL, (HBRUSH)::GetStockObject(NULL_BRUSH), hInstance); return app.MessageLoop(IDC_BigPhoto); } . . . |
| Step C |
| Modify the Window_Paint event as shown. Modifique el evento de Window_Paint como se muestra. |
| BigPhoto.cpp |
| void BigPhoto::Window_Paint(Win::Event& e) { CG::Gdi gdi(hWnd, true, false); //_____________________________ 1. Compute x and y const int x = this->ScrollPositionH; const int y = this->ScrollPositionV; //_____________________________ 2.Paint on buffer CG::Gdi gdiBuffer(doubleBuffer, gdi.GetRcPaint(), false); gdiBuffer.DrawBitmap(bitmap, -x, -y); //_____________________________ 3.Paint on the screen gdi.DrawDoubleBuffer(doubleBuffer); } |
| Step D |
| Modify the Window_Size event as shown. Modifique el evento de Window_Size como se muestra. |
| BigPhoto.cpp |
| void BigPhoto::Window_Size(Win::Event& e) { //_____________________________________________________ 1. Setup the scroll bars this->SetScrollRangeH(0, MAXIMUM(0, bitmap.GetWidth() - width)); this->SetScrollRangeV(0, MAXIMUM(0, bitmap.GetHeight() - height)); //_____________________________________________________ 2. Create buffer doubleBuffer.CreateCompatible(hWnd, width, height); } |
The Table View (Win::TableView class) |
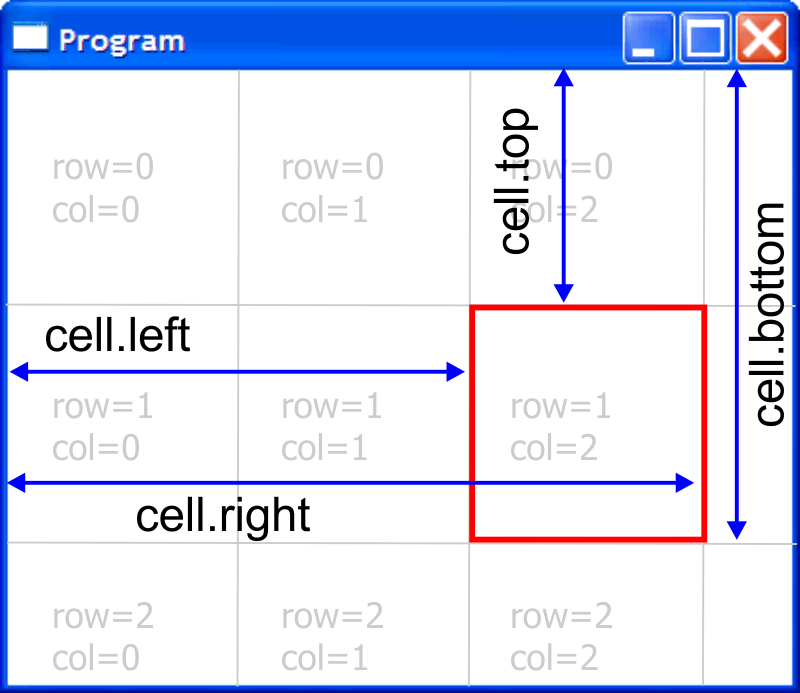
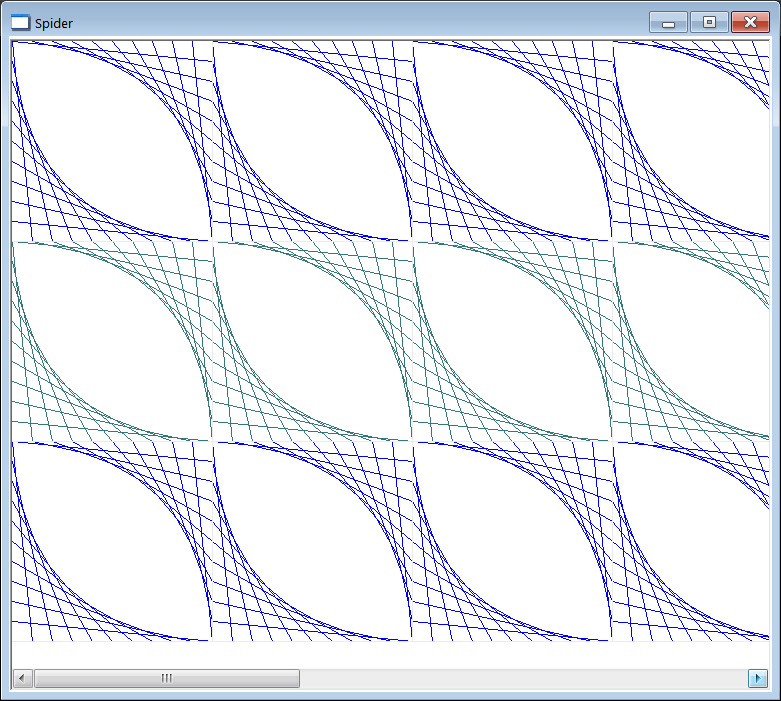
| The Table View is very useful when it is necessary to draw similar objects in the window, or when the objects do not fit inside the window. The PaintCell function is used to draw the contents of each cell in the control. It is very important to note that in order to paint each cell, the rectangle cell must be used to know the position and dimensions of the cell, see figure below. El Table View es muy útil cuando es necesario dibujar objetos similares en la ventana, o cuando los objetos no caben dentro de la ventana. La función PaintCell PaintCell es usado para dibujar el contenido de cada celda del control. Es muy importante observar que a fin de pintar cada celda, el rectángulo cell debe ser usado para conocer la posición y dimensiones de la celda, vea la figura de abajo. |
| Problem 3 |
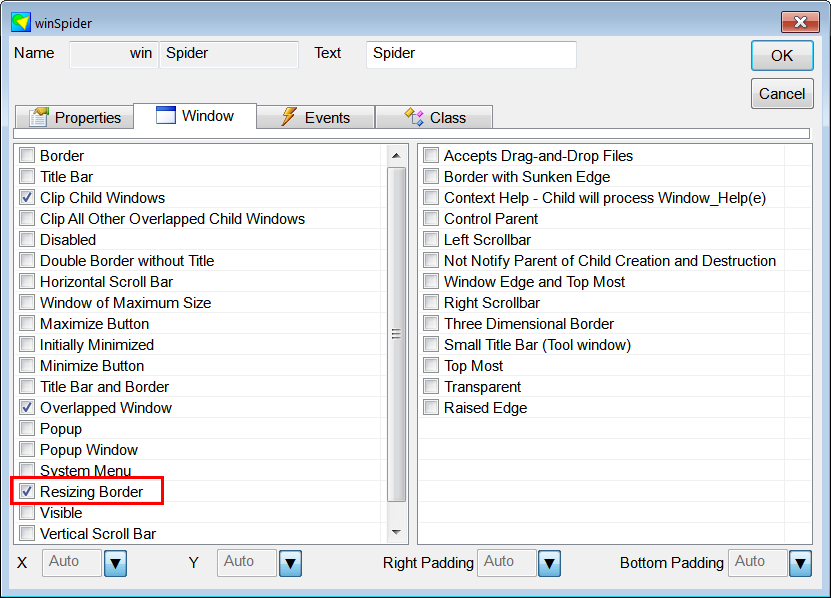
| Create a program called Spider using a window application. After creating the project, open Wintempla and click anywhere in the editor to set the Resizing Border as shown. Use a total of 10 lines to draw each cell. Cree un programa llamado Spider usando una aplicación de ventana. Después de crear el proyecto, abra Wintempla y haga clic en cualquier parte del editor para fijar Resizing Border como se muestra. Use un total de 10 líneas para dibujar cada celda. |
| Step A |
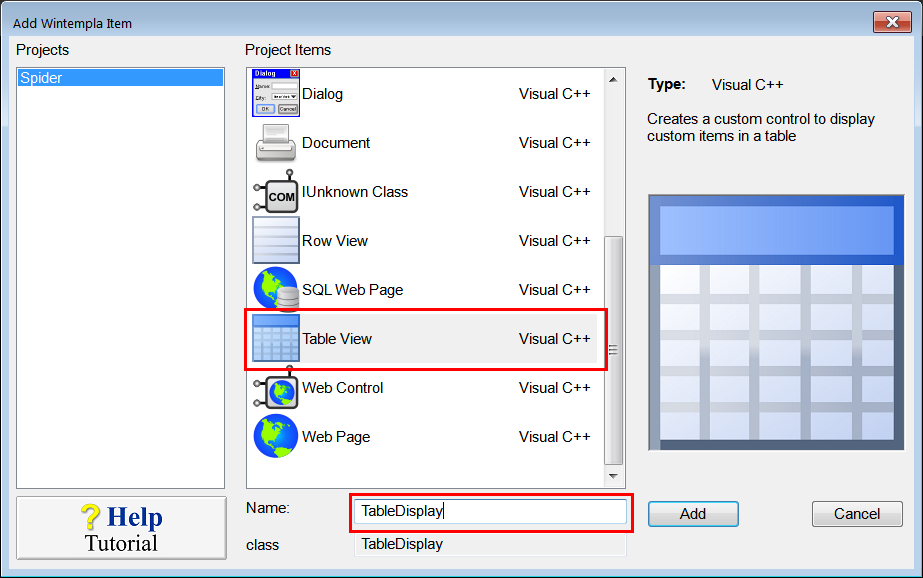
| After creating the project, use the menu Tools > Add Wintempla Item... to insert a Table View as shown. Después de crear el proyecto, usa el menú Tools > Add Wintempla Item... para insertar un Table View como se muestra. |
| Step B |
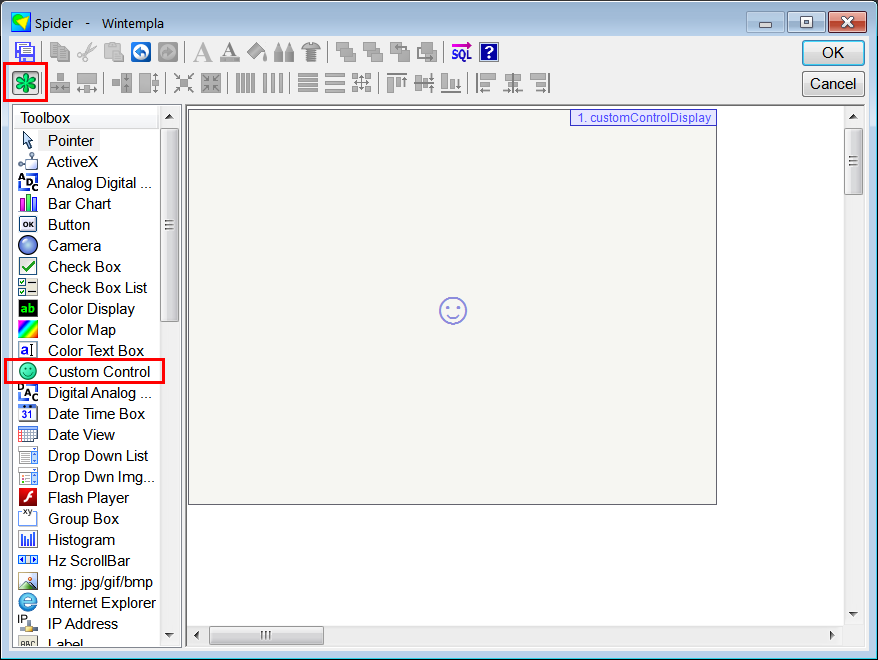
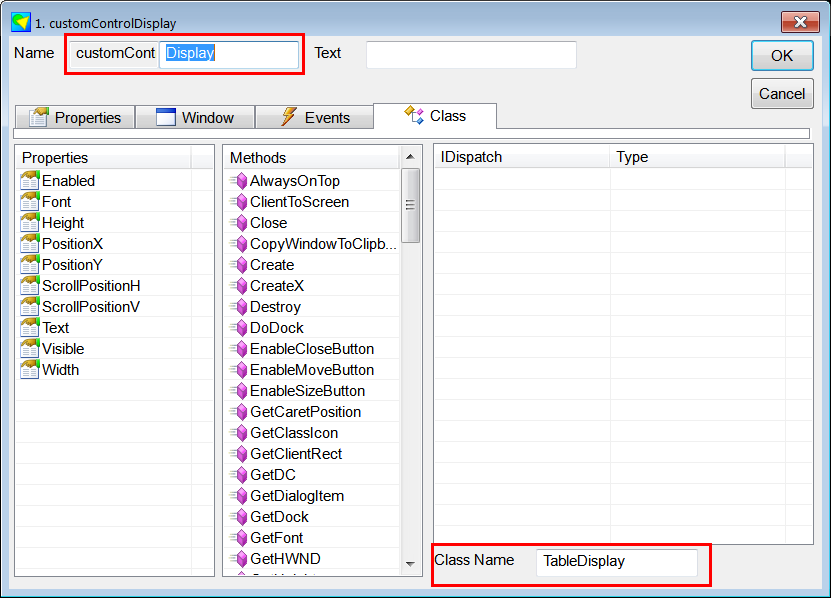
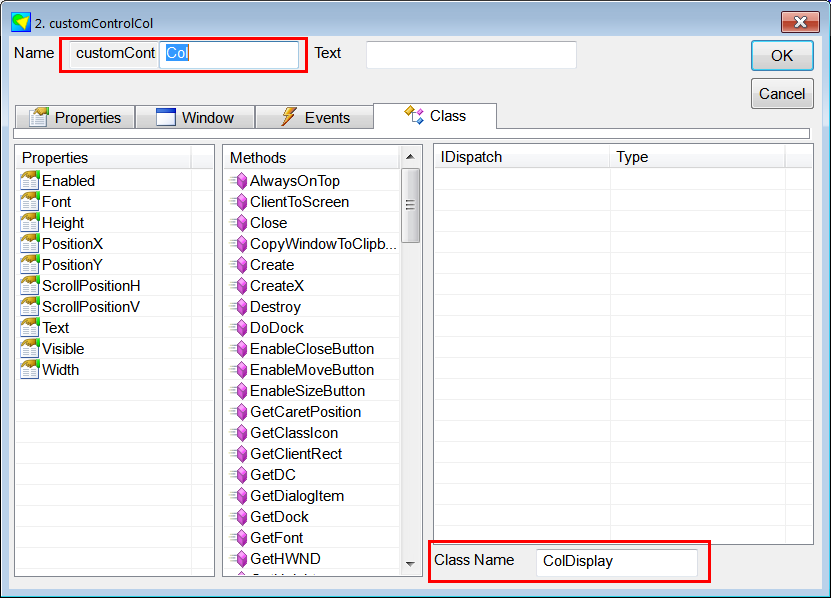
| Use Wintempla to insert a Custom Control as shown (you need to click on Show All Controls in Toolbox in the toolbar to show the custom control). Be sure to set the class name to TableDisplay. Use Wintempla para insertar un Custom Control como se muestra (usted necesita hacer clic en Show All Controls in Toolbox en la barra de herramientas para mostrar el custom control). Asegúrese de fijar el nombre de la clase TableDisplay. |
| Step C |
| To resize the control when the window resizes, dock the control in the all sides to window border. Para cambiar de tamaño el control cuando la ventana cambia de tamaño, use los tornillos dock para fijar todos los bordes del control a los lados de la ventana. |
| Hint |
| Use the Window_Paint code of the EyeSpider problem (Wintempla > Graphics > Pens ) adding cell.left to the values of x and cell.top to the values of y. The width of each cell is cell.right-cell.left. The height of each cell is cell.bottom-cell.top. Use el código Window_Paint del problema EyeSpider (Wintempla > Graphics > Pens ) sumando cell.left a los valores de x y cell.top a los valores de y. El ancho de cada celda es cell.right-cell.left. La altura de cada celda es cell.bottom-cell.top. |
| Step D |
| Edit the Spider.h file as shown. Edite el archivo Spider.h cómo se muestra. |
| Spider.h |
| #pragma once //______________________________________ Spider.h #include "resource.h" #include "TableDisplay.h" . . . |
| Step E |
| Edit the TableDisplay.cpp file as shown. Edita el archivo TableDisplay.cpp cómo se muestra. |
| TableDisplay.cpp |
#include "stdafx.h" #include "TableDisplay.h" TableDisplay::TableDisplay() { RowHeight = 200; ColumnWidth = 200; RowCount = 3; ColumnCount = 8; } TableDisplay::~TableDisplay() { } void TableDisplay::PaintCell(int paintEvent, CG::Gdi& gdi, const RECT& cell, int rowIndex, int colIndex, bool isSelected) { if (paintEvent == WNT_PAINTCELLSBEGIN) { gdi.SetBkMode(true); } else if (paintEvent == WNT_PAINTCELL) { const int cellWidth = . . . const int cellHeight = . . . const int lineCount = 10; const double deltaX = . . . const double deltaY = . . . . . . gdi.Select(pen); for (int i = 0; i<lineCount; i++) { . . . } } else if (paintEvent == WNT_PAINTCELLSEND) { gdi.SetBkMode(false); } } void TableDisplay::OnFontSet(const LOGFONT& logFont) { } |
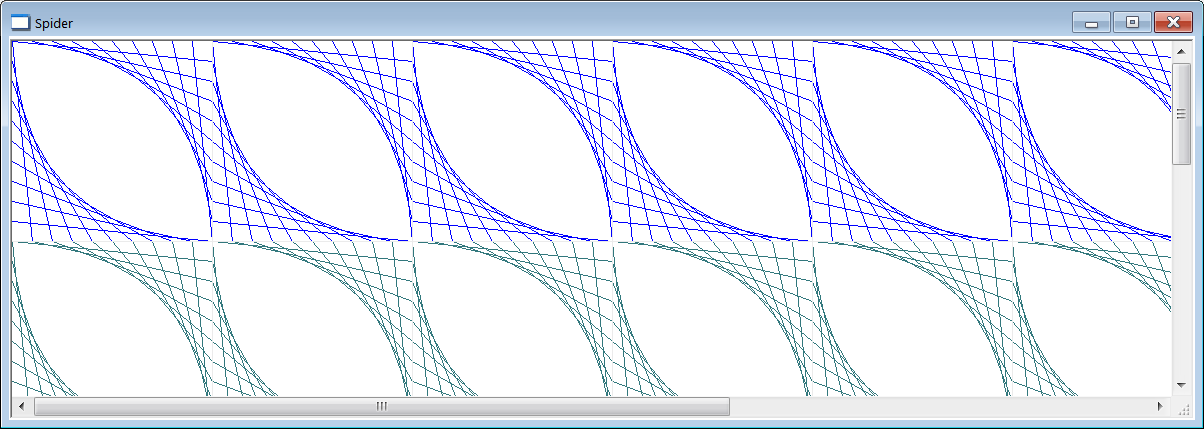
| Problem 4 |
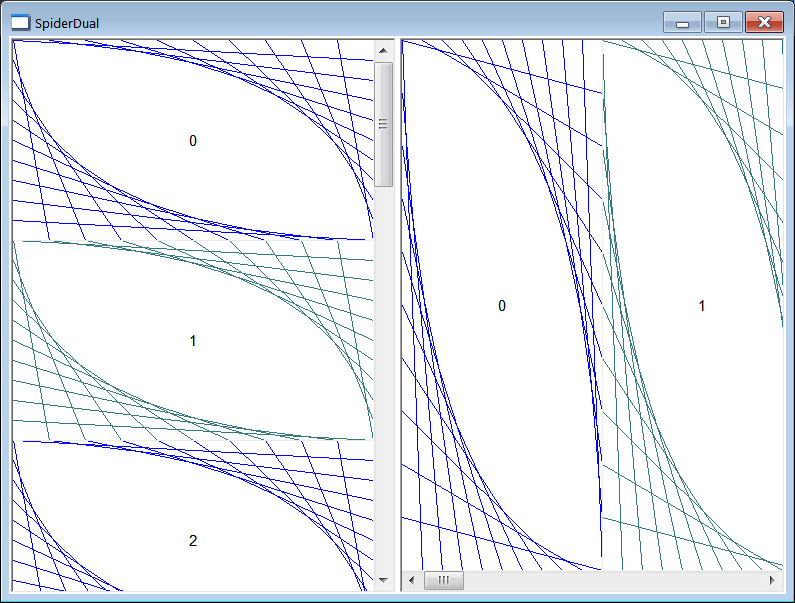
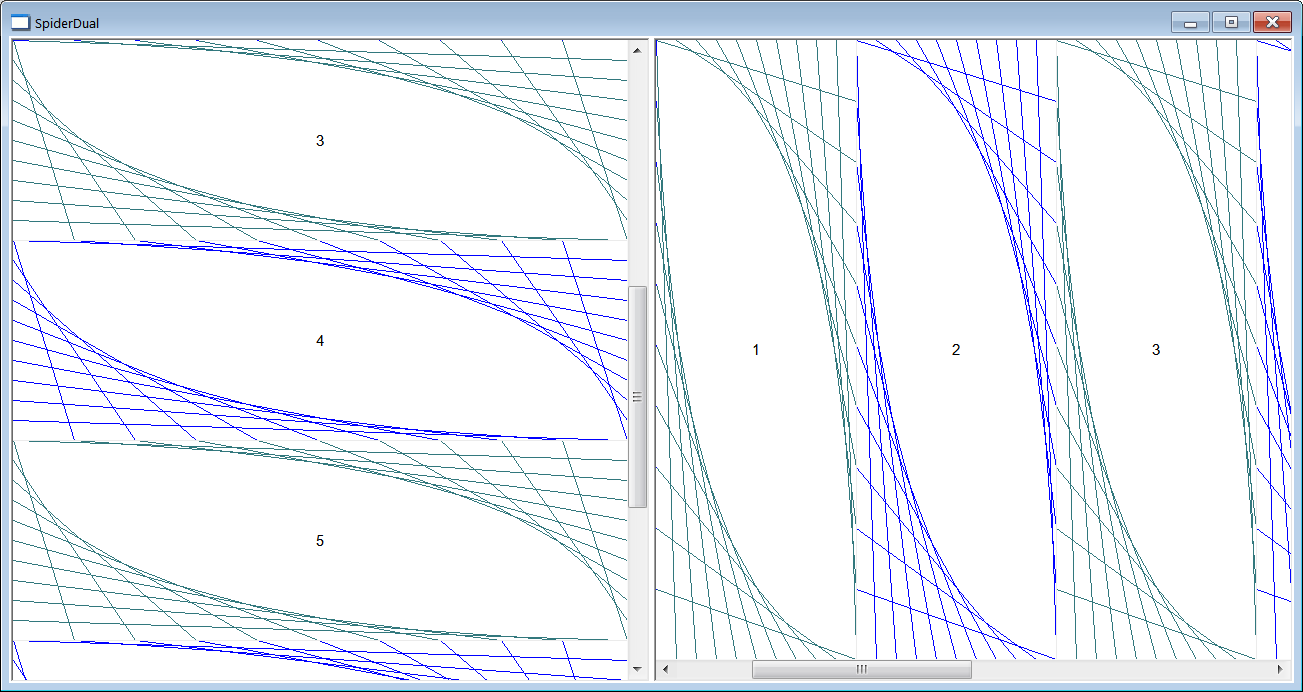
| Repeat the previous problem, but instead of inserting a Table View (Win::TableView class), you will use a RowView (Win::RowView class) and a ColumnView (Win::ColumnView class). Call your project SpiderDual. Repita el problema previo, pero en lugar de insertar un Table View (Win::TableView class), usted usará un RowView (Win::RowView class) y un ColumnView (Win::ColumnView class). Llame a su proyecto SpiderDual. |
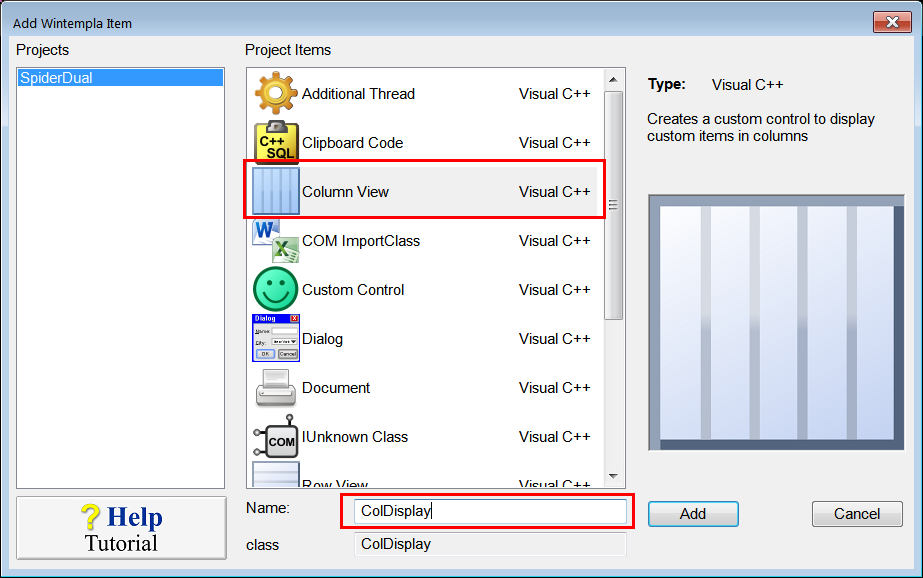
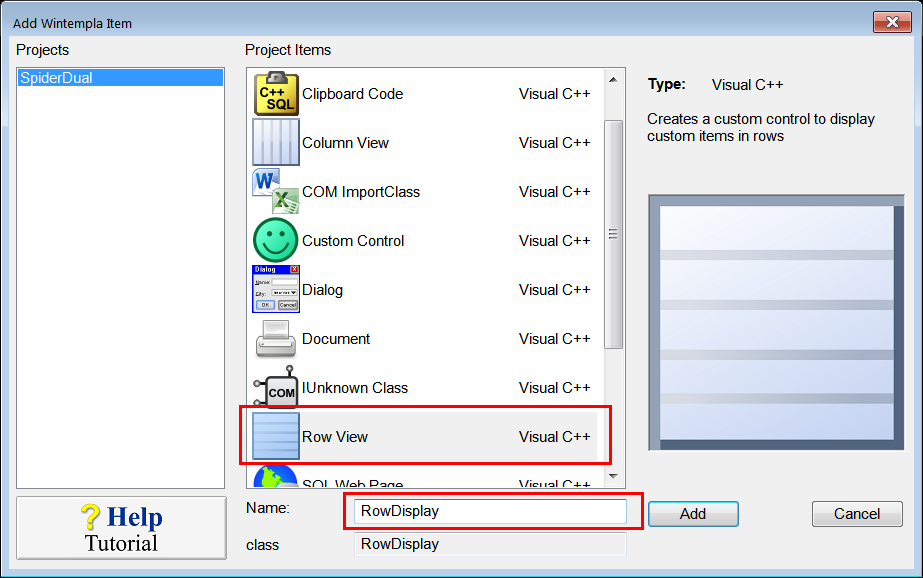
| SpiderDual.h |
| #pragma once //______________________________________ SpiderDual.h #include "Resource.h" #include "ColDisplay.h" #include "RowDisplay.h" . . . |
| Tip |
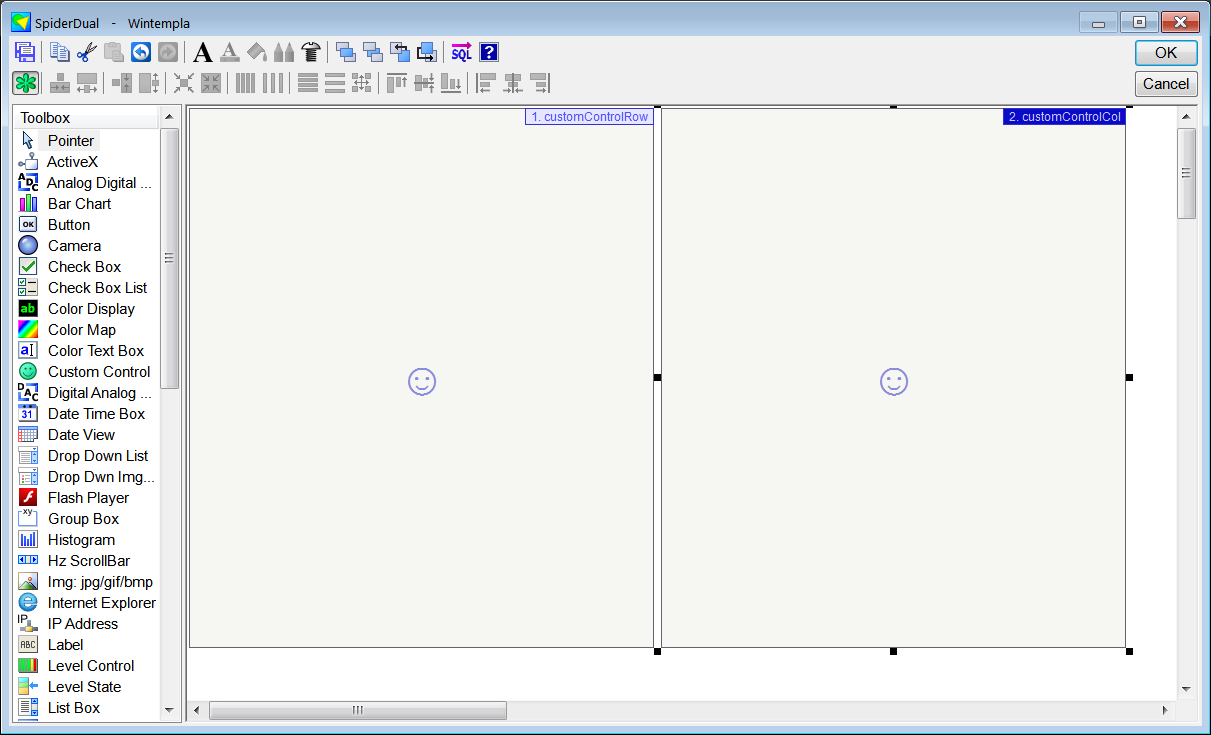
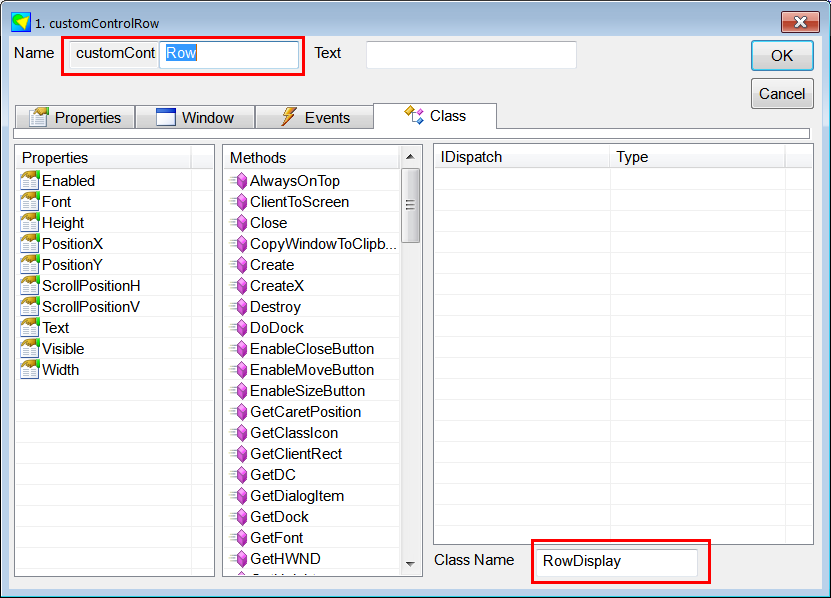
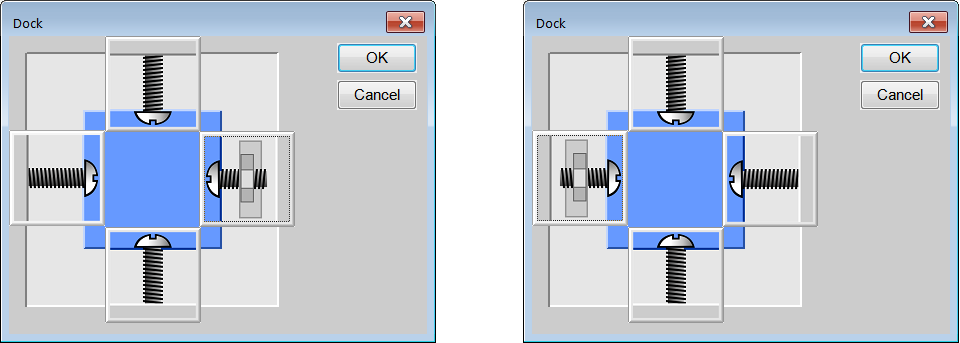
| You may use the docking shown, for the customControlRow use the docking shown on the left, for the customControlCol use the docking shown on the right. Usted puede usar el docking mostrado, para el customControlRow use el docking mostrado en la izquierda, para el customControlCol use el docking mostrado en la derecha. |
| ColDisplay.cpp |
| #include "stdafx.h" #include "ColDisplay.h" ColDisplay::ColDisplay() { ColumnWidth = 200; ColumnCount = 8; } ColDisplay::~ColDisplay() { } void ColDisplay::PaintCell(int paintEvent, CG::Gdi& gdi, const RECT& cell, int rowIndex, int colIndex, bool isSelected) { if (paintEvent == WNT_PAINTCELLSBEGIN) { gdi.SetBkMode(true); } else if (paintEvent == WNT_PAINTCELL) { . . . gdi.Select(pen); for (int i = 0; i < lineCount; i++) { . . . } } else if (paintEvent == WNT_PAINTCELLSEND) { gdi.SetBkMode(false); } } void ColDisplay::OnFontSet(const LOGFONT& logFont) { } |
| RowDisplay.cpp |
| #include "stdafx.h" #include "RowDisplay.h" RowDisplay::RowDisplay() { //______________________________________ Same row height RowHeight = 200; RowCount = 8; } RowDisplay::~RowDisplay() { } void RowDisplay::PaintCell(int paintEvent, CG::Gdi& gdi, const RECT& cell, int rowIndex, int colIndex, bool isSelected) { if (paintEvent == WNT_PAINTCELLSBEGIN) { gdi.SetBkMode(true); } else if (paintEvent == WNT_PAINTCELL) { . . . gdi.Select(pen); for (int i = 0; i<lineCount; i++) { . . . } } else if (paintEvent == WNT_PAINTCELLSEND) { gdi.SetBkMode(false); } } void RowDisplay::OnFontSet(const LOGFONT& logFont) { } |